Phobotic Centerpiece Brushless Gimbal Controller

The Centerpiece is a new brushless gimbal controller my company, Phobotic, has been developing over the last year. It has cutting edge hardware and a pretty sophisticated firmware. The system has many innovative features and very unique algorithms that's meant to take brushless stabilization a step forward. We are specifically addressing the pro market with this controller, that needs reliable stabilization at longer focal ranges compared to the common GoPro setup.

Two of the notable system features:

1. Complete autotune: we were the first to implement this feature, and the autotune we have is complete (there are zero parameters to set on initial setup; our autotune does everything including motor power, pole counts, IMU directions, motor directions, PIDs). It takes 10 minutes from unpacking the board to flying and no use of the GUI is needed.

2. CANBUS connectivity, with separate processors for the IMU and the main board. That means the system has about 5x the processing power of an Alexmos 32 bit and the IMU has a communication channel that's virtually interference-proof, no matter what the gimbal or battery used (and no ferrites needed!).

The Centerpiece comes in two versions, regular which includes a single IMU, rated up to 5S batteries and costs $399, and the Centerpiece HV which is rated up to 10S, ships with two IMUs and costs $599.

The Centerpiece will be released on the 31st of August (about a week from now). If you're interested in one, please put your name down at http://phobotic.com (it's small first batch so it's first come first serve until we get a larger supply of boards).


Here's some RX100 testing, courtesy of Gary Goodrum at tppacks.com. This flight was 100% autotuned, nothing was touched or adjusted:


I advise you to download the raw camera files from here (download, don't watch directly on Dropbox as the quality will be appalling - the raw videos are worth it):
https://www.dropbox.com/s/uw4zs5kazxdvdgy/20140822093038.MTS?dl=0


Another flight, harder:
https://www.dropbox.com/s/up3wzgs7je2lpi5/20140822111740.MTS?dl=0


One in suicidal wind just to make a point (you can hear the Naza fighting the wind, watch the tree and flag on the green below at 2:45):
https://www.dropbox.com/s/6azffzjv9z5mac3/20140822154422.MTS?dl=0

You can find more videos from the development stages here: https://vimeo.com/user22741569/videos

I personally like this one :)
 
Last edited by a moderator:

jfro

Aerial Fun
I have been following your development at that other place.

It seems that it's about a 5 minute calibration from start to finish.

Couple questions.

1. Can you save settings in the event that you have 2 or 3 cameras or different lens that will need a recalibration?
2. Will there be a quick way to change between them in the field?
3. Is there blue tooth or wifi connection to get to the settings?
4. What is the optimal voltage so far to run into your controller or doesn't it matter?
5. If you have a setup that's pretty good and you make some small changes that require minor tweaking, is it going to need the 5 minute retune, or can you start from where it is and have it sort of fine tune it in a few minutes as opposed to the full 5 minutes autotune.

Any chance we can see some faster forward and sideways flying footage ?
 

1. Can you save settings in the event that you have 2 or 3 cameras or different lens that will need a recalibration?

Yes, 5 different banks are provided, each can contain all of the controller settings, so you can tailor completely different behaviors and switch between them.

2. Will there be a quick way to change between them in the field?

Yes, the board has two buttons and 5 bicolor LEDs that provide a simple interface for some of the most common functions (switch banks, turn on follow mode, gain tweaks).

3. Is there blue tooth or wifi connection to get to the settings?

There is Bluetooth on the HV, but right now I don't have a specific date where it'll be supported so I'm not advertising that fact. If there will be demand, we will provide support for that.

4. What is the optimal voltage so far to run into your controller or doesn't it matter?

It doesn't matter. From our testing I know that our voltage compensation is stellar and you can run the same gimbal with the same settings on 5S or 3S without changing a thing. Ideal voltages depend a lot on the motors used. Anyway, it's very flexible and you can throw away those BECs and run direct battery connection.

5. If you have a setup that's pretty good and you make some small changes that require minor tweaking, is it going to need the 5 minute retune, or can you start from where it is and have it sort of fine tune it in a few minutes as opposed to the full 5 minutes autotune.

The tuning process is split in two parts. You can run the complete tuning, or just the finer part of the tuning, and you can do so for each axis individually.

Any chance we can see some faster forward and sideways flying footage ?

Of course. I'll make sure to have that in the next videos. This video has about 40mph forward flight, but that was development firmware and everything is much better today (especially the horizon):

 
Last edited by a moderator:

min0nim

Member
This is pretty impressive. Are you finding any particular gimbal/motor combinations are working better for you than others?
 
Last edited by a moderator:

eirlink

Member
good luck with the launch Samur. Really impressive product. i will be getting one :highly_amused:

by the way, is there a software download . interface gui for this?


This is pretty impressive. Are you finding any particular gimbal/motor combinations are working better for you than others?

High pole count motors, stiff gimbal construction is what you need. RCTimer Legacy works well but it has to be modified a bit for security (mainly drilling through the motor shaft clamps and placing bolts through the shafts instead of just relying on the set screws). This controller produces quite a significant amount of holding power, too, which makes it more tolerant to gimbal issues (to a point).
 

min0nim

Member
Fantastic that you're getting such good results with the RCTimer! That makes a pretty affordable gimbal system all up.

Can you see any reason it wouldn't work with the AV200 IDD? I'm looking to keep weight down....
 

Fantastic that you're getting such good results with the RCTimer! That makes a pretty affordable gimbal system all up.

Yep, about $900 all in. It's a great gimbal.

Can you see any reason it wouldn't work with the AV200 IDD? I'm looking to keep weight down....

Did anyone ever get reasonable results with the AV200 IDD? It uses 1:10 reduction on the roll which sounds like way too much for responsive operation. If you want something of the IDD genre, check out the Hexacrafter G2. It's a quality piece of equipment, and we're now testing it with the Centerpiece. The price is reasonable too.
 

kloner

Aerial DP
the g2 3 axis with a gh4, decent glass and all the goodies for two man including a 5 amp hour 4s is 5 lbs.

We couldn't get an idd200 to work mechanicaly on any board,,, that v drive things pretty lame


jfro

Aerial Fun
I think to see any roll drift, I'd need to see it over water with a straight water horizon line......


I think to see any roll drift, I'd need to see it over water with a straight water horizon line......

That's the beauty of test flying in the Bay Area, because the entire horizon line on the downward part is water :) Check out the hard turn at 1:30, it's facing the water all the way. Dead straight.
 

yea 2nd, go to 1:17, 1:46,

1:17 is completely straight, look at the house directly at eye level at the left of the frame. There's a hill obstructing the bay on the back so it seems like drift, but its fine. At 1:33 you can see the bay on the right and its level as it can be. 1:47, again, you see water right in the horizon and they're level.
 

jfro

Aerial Fun
1:17 is completely straight, look at the house directly at eye level at the left of the frame. There's a hill obstructing the bay on the back so it seems like drift, but its fine. At 1:33 you can see the bay on the right and its level as it can be. 1:47, again, you see water right in the horizon and they're level.

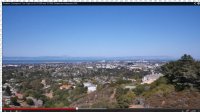
I have to agree, there is no drift there at 1:16. I grabbed it, put it into photoshop, and put a guide line which is complete level. Looks good to me....

attachment.php
 

Attachments

  • sanfranbay.jpg
    sanfranbay.jpg
    112.5 KB · Views: 477


jfro

Aerial Fun
Thanks for taking the time to do that :D

Your welcome.

I'm on your list and if the dang thing works, it's going to cost me as I've 4 gimbals....... Go pro, gh2's, gh3, gh4, 5d mark ii & Black Magic. Use them all at one time or another.... I texted you a few months ago about testing as I've been watching and waiting patiently....

I'm getting anxious for Sept 1 to come....

Blue sky here. Very little wind. Getting ready to pack 3 MR's and head to some cliffs for some testing on Lake Ontario. To good a day to not fly...... hell with chores and work!
 

Top