ESCs and extended power wires: Should we add capacitors?

Pumpkinguy

Member
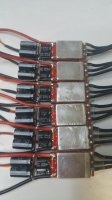
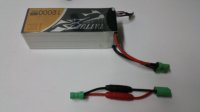
This thread is an oldie but a goodie. I'm thinking about moving my esc location further out for a number of reasons. I did this esc today just as a mock up.

Stock caps are 470uf and these are 1200. Probably way overkill.
1 x 1200uf would fit better and effectively double the stock capicitors. I may go that route.
 

Attachments

  • 20151218_174812.jpg
    20151218_174812.jpg
    109.8 KB · Views: 453

Motopreserve

Drone Enthusiast
I thought that the suggestion was to use the same caps as the ones Currently installed. I could be wrong, that was read a while back, and miles into that initial thread on the subject :)
 

Pumpkinguy

Member
The same type of caps but ultimately the only downside to going larger is weight and cost. They weigh nothing and cost nothing imo.
 

Ccard

Member
This thread is an oldie but a goodie. I'm thinking about moving my esc location further out for a number of reasons. I did this esc today just as a mock up.

Stock caps are 470uf and these are 1200. Probably way overkill.
1 x 1200uf would fit better and effectively double the stock capicitors. I may go that route.

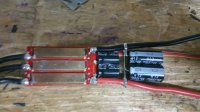
Adding [2 x 1200 uF] 2400 uF should compensate for an additional 10 inches of wire length for the power lead to the ESC.

I read an article that discussed these matters in technical detail, but that was a few years ago and I can't find it anymore.

I did find a thread on RCgroups that seems to be inline with what I recall from the 'other' article.
Here's a link => http://www.rcgroups.com/forums/showthread.php?t=952523

It boils down to: ~ 220 uF additional capacitance [Low ESR Caps] for each additional 10 cm/4 inches of length.
[ Post #572 in above link ]

Also a low motor/ESC PWM rate is better for long battery lead situations... and Japanese caps are preferable.
 

Pumpkinguy

Member
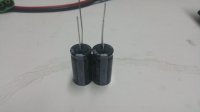
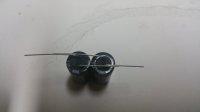
Here is my process.

A drop of ca glue to hold them together.
Bend the wires. - to one side and + to the other.
Trim the first wire so it doesn't extend past the outside of the second cap.
Slip heat shrink over the wire then solder the 2 together.
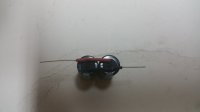
Slip a tiny length of heat shrink over the soldered area.
Wrap the - around the negitive wire, the positive around the positive then solder.
I still need to put some heat shrink over the end with the caps. Just waiting on longer servo wires. I need about 4" longer. View attachment 27067View attachment 27068View attachment 27069View attachment 27070
 

Attachments

  • 20151220_082314.jpg
    20151220_082314.jpg
    44.2 KB · Views: 454
  • 20151220_083026.jpg
    20151220_083026.jpg
    41.7 KB · Views: 498
  • 20151220_083412.jpg
    20151220_083412.jpg
    42.9 KB · Views: 449
  • 20151220_090907.jpg
    20151220_090907.jpg
    43.2 KB · Views: 598

Ccard

Member
With all that capacitance there's going to be the potential for huge arcing/spark
on battery connect.
This could cause the connectors to sort-a spot weld at the initial contact points making the connectors feel 'sticky' ..or ruin the contact mating surfaces.
One way to mitigate this is to use some sort of a pre-charge connection with power resistor.
For instance, a 5 watt / 100 ohm power resistor for what appears to be a total of 20000 uF would take about 10 sec to fully charge the caps.

Chris
 

Pumpkinguy

Member
I have thought of it all my friend.

I already use a sparkless/sacrificial harness to install battery #1. Then I install battery #2. Then I remove sparkless/sacrificial harness from battery #1 and reconnect #1 normally. Make sense?
 

Ccard

Member
I have thought of it all my friend.

I already use a sparkless/sacrificial harness to install battery #1. Then I install battery #2. Then I remove sparkless/sacrificial harness from battery #1 and reconnect #1 normally. Make sense?
Yes it does. You've got it under control... I can say no more.

Cheers
Chris


Pumpkinguy

Member
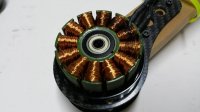
I just smoked a motor on the bench. Tmotor u7-490v2. 2 minutes at 90% throttle with 18" props. pulling 68 amps.
I don't use 18" props but these motors are rated for them. I was doing a esc temp test. I am not real deep with electronics. Could this have anything to do with the extra caps? Motor was up around 200F at time of failure. View attachment 27129
 

Attachments

  • 20151225_202356.jpg
    20151225_202356.jpg
    85.4 KB · Views: 285

Motopreserve

Drone Enthusiast
Oh man! Sorry to hear that. I guess better on the bench than in the air - but now you've got more questions than answers?

What part of the motor was the 200f measurement taken at?
 

fltundra

Member
Caps had nothing to do with it. Max amps for those motors I can see is 62 amps. You just overheated that one, carbon fiber mounting is not a good heat sink.:)

Max Continuous current(A)180S.............................................................44A
Max Continuous Power(W)180S.......................................................1300W
 

Pumpkinguy

Member
Ya. Maybe I was a little hard on it. Lol. That motor pulls 80 amps at full throttle with 18's. I do like to push my bench tests.
Moto, thay temp reading was on the Bell. Probably hotter inside.
 

Top